HQT201
Double Arm Full Motion TV/Monitor Wall Mount Bracket
129.512UK
Introductgion
Thank you for choosing av:link HQT201 TV/Monitor Bracket. This bracket constructed with reinforced steel structure allow display device up to 40 inches or up to 15kg in weight to be mounted on wall safely. Designed to be easily installed and supplied with all required installation hardware.
Contents
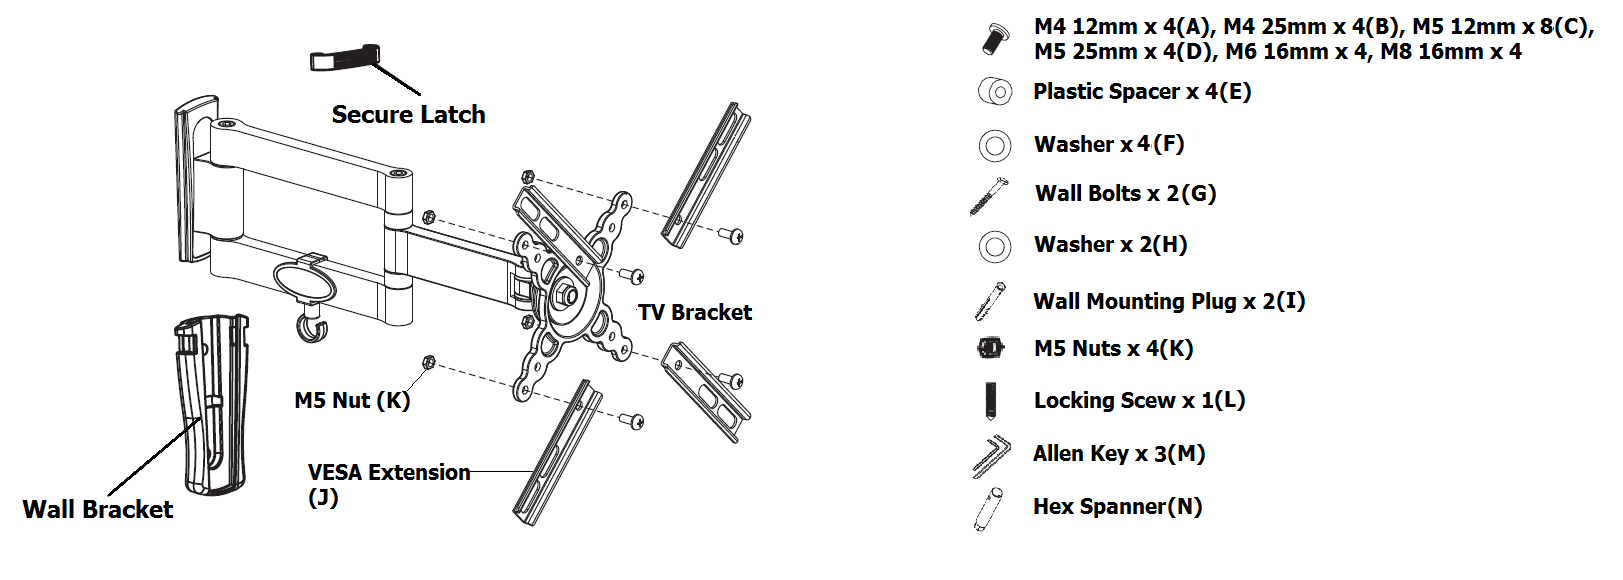
Please check all contents list below are included inside the box and return to retailer or dealer if components missing.
For this installation you will also require pencil, tape measurer, electric drill, stud finder and Philip (cross) screw driver.
Fixing Wall Bracket
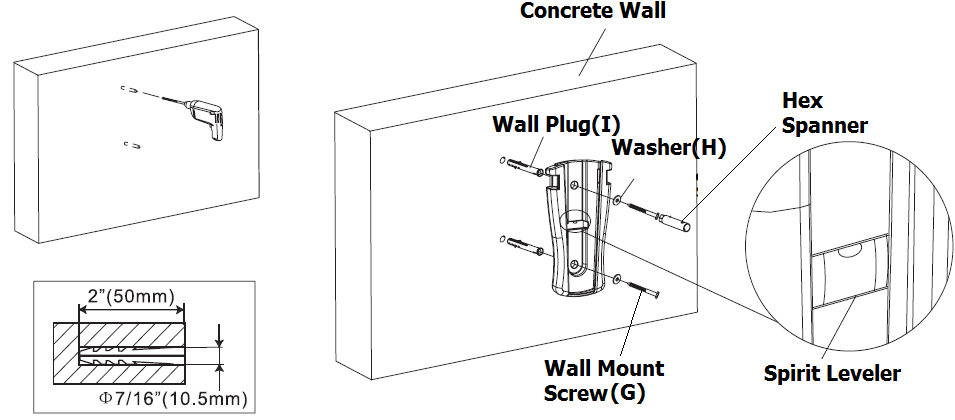
Step 1 – For concrete wall installation first of all work out the height of the installation and ensure the spirit leveler indicate is leveled. Use pencil to mark where the mounting holes will be and use an electric drill to drill a hole that is around 7/16” (10.5mm) wide and 2”(50mm) deep. Insert the wall mounting plug into the hole and install the wall bracket as following.
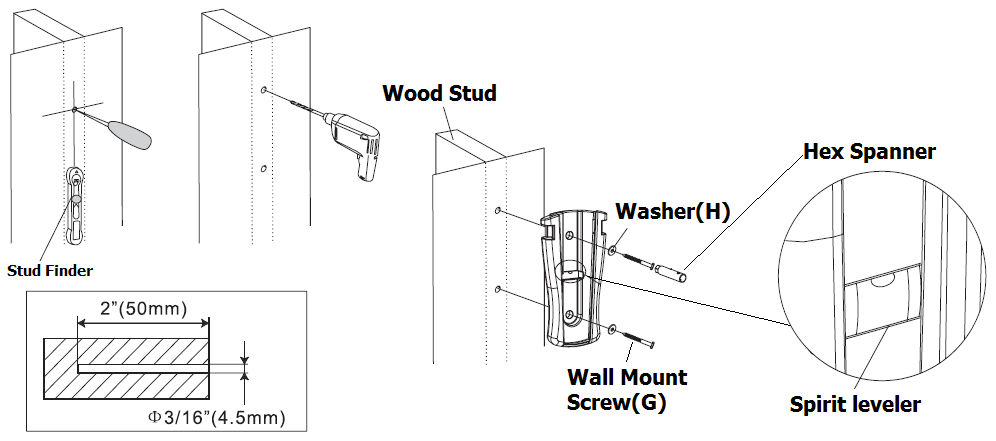
For Plaster wall installation first of all you need to find out where the wood stud is behind the wall using a stud finder. Then work out the height of the installation and ensure the spirit leveler indicate is leveled. Use pencil to mark where the mounting holes will be and use an electric drill to drill a hole that is around 3/16” (4.5mm) wide and 2”(50mm) deep. Install the wall bracket as following.
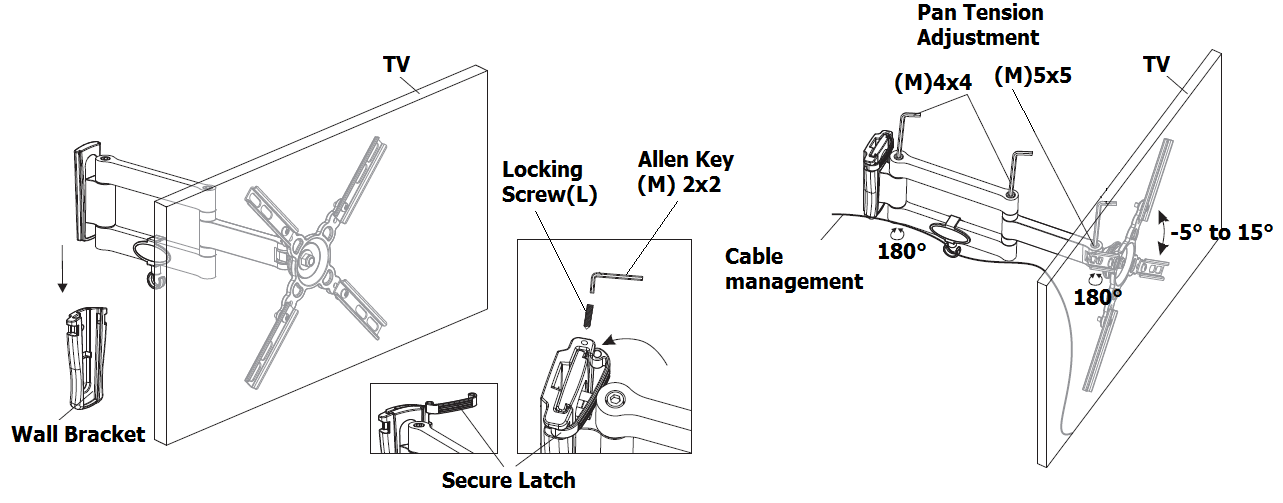
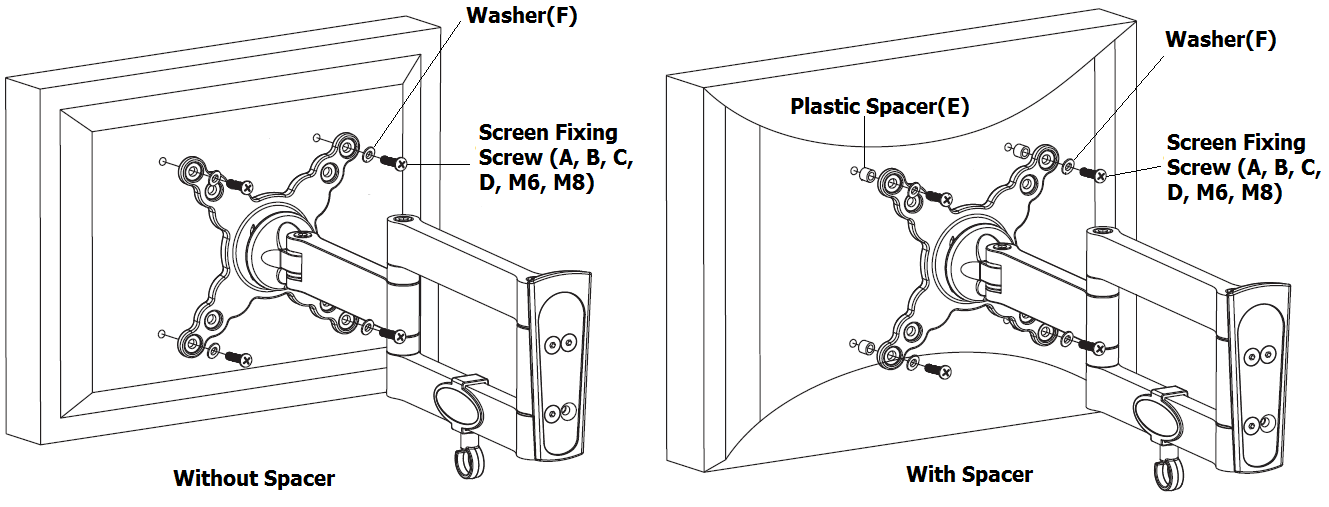
Step 2 – Fixing TV bracket to the screen, please use plastic spacer if the back of the screen is uneven.
For VESA size bigger than 100x100, supplied adapter will allow bigger mounting VESA to fit up to 200x200. Please attached VESA extension arms as shown below using M5 12mm screw and nuts supplied.

Step 3 – slide the TV with attached bracket on to the wall bracket. Clip the secure latch on and screw down the locking screw using supplied allen key. The tension of the pan can be adjusted with the allen key as show below. Tuck all cables into the cable management hook at the bottom of the bracket to increase neatness of overall installation.